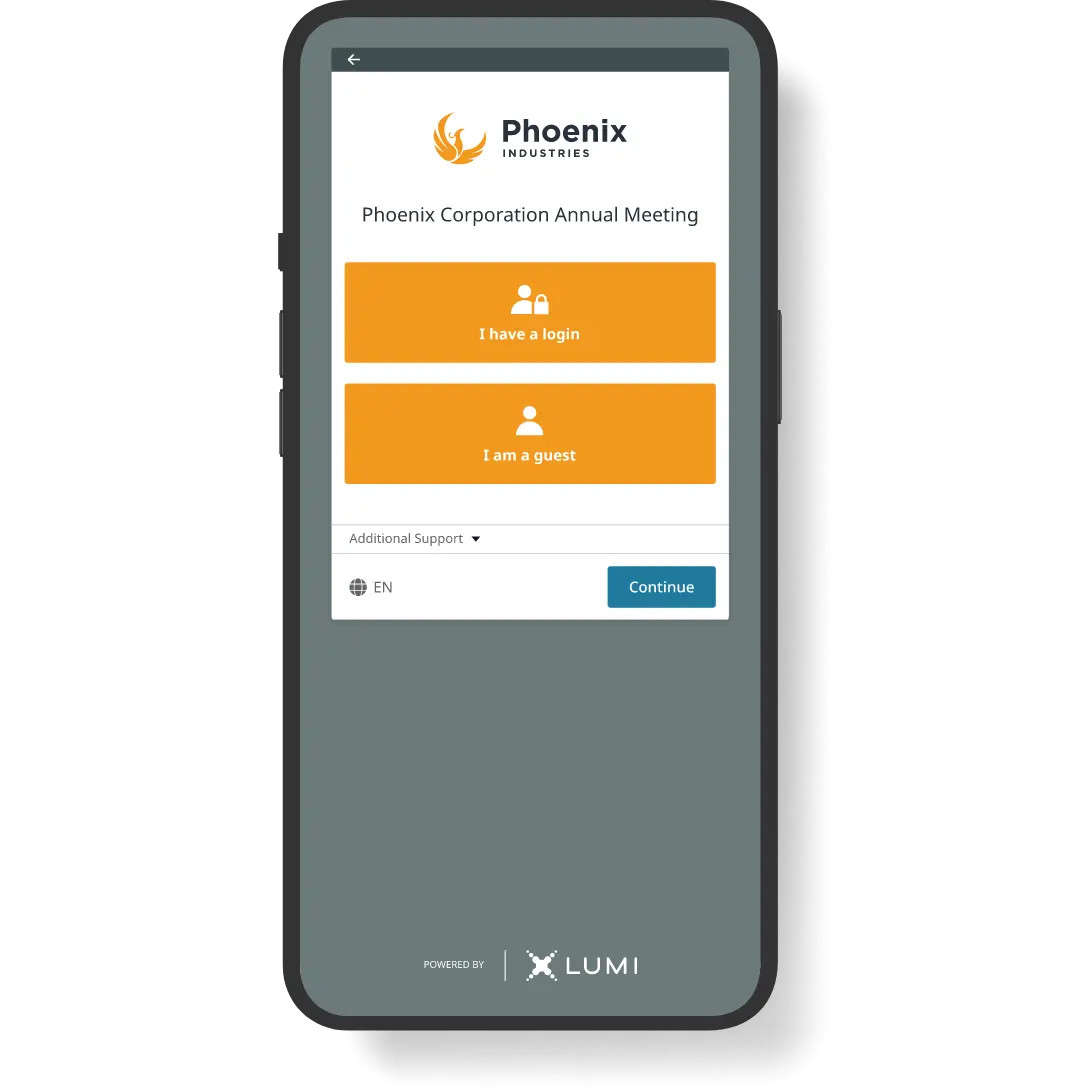
Introduction


Welcome to our self-guided walkthrough of our end-to-end platform. 

Click the information tags to see what features are available on each screen, download the feature guide, or click the video to see the platform in action.

intro

1. Login Page


The live meeting login experience can be branded and themed to the meeting and customized to suit the setup you require, be that secure authenticated login, open guest access, or a combination of the two. 

Optional terms and conditions can be included and additional support information can be provided to help participants access the event.

Login

Event login logo
The event login logo can be an independent image to the live meeting platform helping to reassure your participant they are accessing the correct meeting.

Event title
A meeting name can be customized and the text themed to hex values or selected via a color palette. It can be hidden if not required.

Registration fields

Registration fields can be added or removed and the text customized to suit your meeting.

Default fields include first name, last name, company, and email. You can enter preset capacities for your participants to choose from and these will be appended to their details in reports and any messages sent.

Capacities
A pre-defined list of capacities represented at the meeting can be displayed for the participant to select from. This information is appended to any messages sent in as well as the reporting.

2. Home screen


The home screen allows access to important account information, meeting instructions, and feature navigation. 

Logo's, event banners and theming can all be applied for a tailored event experience.

Home

Event logo
The event logo can be displayed in the side bar.

Account information and localization
Account information such as name  can be displayed alongside the language selected.

Navigation
The feature navigation will display available features to the participant dependant on settings. This can be icon only or icon and text. The text can be customized to suit your meeting. Te theme colors selected will affect this feature.

Event banner
The event banner (400px x 100 px) is displayed at the top of the home panel.

Meeting information
Important meeting information and instructions can be displayed to participants and the text can be hidden from capacities such as guests.

3. Messaging


Our online written messaging feature allows participants to categorize their question before submitting it to the meeting. 

Messaging

Categorization
Participants can select from a predefined list of categories set by the company. This list can be updated during an event. The selection is displayed in the admin console and appended to the message when displayed on a stakeholder project.

Question entry
Questions of 250, 1000 or 3000 characters can be entered into the text box. A character count lets participants know how many characters they have available. The participant must press the arrow to send.

All Messages
The all messages tab will display any message that has been made public by a moderator. This can be disabled if required.

My Messages
My messages displays any message sent by a participant and any response received from a moderator. These will be time stamped and show in different colors to differentiate them.

Messages
Messages show the name and any information entered during the login process such as company and capacity. A timestamp of when the message was sent is also visible underneath the participants details. When a message is sent or received, a toast message appears to highlight it.

4. Documents


Documents can be released at any stage during the meeting and viewed within the device. If the participant wishes, they can download the document to their device.

Documents

Download document
Participants can download documents to their device. Up to 50 documents can be displayed in the list and the document name can be customized in the admin console.

Exit document
Clicking the X will take participants back to the document select screen.

Scroll document
Participants can use the scroll bar to scan through the document.

5. Broadcast


Lumi's integrated broadcast panel lets participants watch the meeting from within the platform. 

If verbal or video questions are allowed, these features can be accessed through the request to speak button available in the broadcast panel to communicate their vote to the meeting.

The broadcast screen can be minimized to utilise features or maximized for an enhanced viewing experience.

Broadcast

Pause / Play

If available the participants can pause and play the broadcast.

Request to speak
If a participant wishes to ask a verbal or video question, the must click the "request to speak" button visible at the top of the maximized broadcast panel or at the bottom when minimized.

Exit full screen broadcast
To return to the feature platform the participant must click the X icon.

Video controls
Control the volume and other settings from this bar.

6. Virtual Microphone


Lumi's audio only virtual microphone lets participants categorize their question before being authenticated by a moderator and submitted to the speaker queue. 

Key stakeholders are instantly informed of the the request to speak and will call the participant to the floor where their microphone with be enabled.

Microphone

Join a queue to ask a question
When  a participant clicks the "request to speak button" they will be automatically transferred to the "Join Queue" page. When they are ready they must press the green button to enter the queue and speak to a moderator who will run some checks. When the participant is called to speak they will be unmuted and able to put their question to the meeting. 

Exit virtual microphone
When the participant has finished answering their question they can select "Return to broadcast" to watch the live meeting. They will still be able to hear the audio when they are in the queue.

7. Virtual Video


Virtual video is Lumi's latest Q&A enhancement that lets participants ask question face to face no matter where they are in the world.

Once a participant has submitted their request to speak, a moderator authenticates them before placing them in the speaker queue. 

Key stakeholders are instantly informed of the the request to speak and will call the participant to the floor where their microphone and camera  will be enabled.

Video

Moderator
When the participant has confirmed their microphone and camera settings they will speak to a moderator who will authenticate them and place them in the speaker queue.

Return to broadcast
When the participant is ready, they can return to the live broadcast.

Live broadcast
The participant will still be able to watch and listen to the live broadcast whilst they are in the virtual video queue.

Video controls
Participants can select their preferred camera and audio settings using the cog icon. They will also see when their video and camera has been activated.

Leave the queue
Participants can leave the queue to return to the live broadcast.

8. Moderation


The moderation feature can be enabled or disabled. When disabled messages are published publicly on the platform. When disabled, moderators can review messages, sort and prioritize them in folders, assign labels to categorize messages, and display them to key stakeholders on customizable displays.

Moderation

Side bar

The sidebar menu can be minimized to enhance the moderation screen. Moderators can access the messaging tab, which displays all the messages received from participants or created by other moderators, and the data tab, to get an Excel record of all interactions.

There are also quick links to access participant information such as the meeting ID, app link, and direct participant app link.

Meeting control
The meeting control drop-down shows the current status of the meeting; started, informed, or closed. It also displays the unique 9-digit meeting ID.

Connection counter
The connections counter shows an overview of the participants in the meeting database and those who have connected.

Label
The label tag allows moderators to create categories which can then be applied to messages by moderators or participants, if enabled, to assist speakers with the topic of discussion.

Folders
Folders can be created to sort messages which can then be displayed on separate stakeholder displays.

Messages
Moderator and participant messages are visible in the messaging window and are differentiated by color.

9. Reporting


The post-event reporting is handled by our skilled team of project managers who will ensure that all reports are produced and packaged up at the close of the meeting. At any point, moderators can access live data through the admin console and see information on attendance, pre and live voting, and messages.

Reporting

Attendance Summary

The attendance summary gives an overview of the meeting, where it was held, and how many votes were represented. 

Attendance Details
The attendance details pane details each participant in a row, recording email, name, company, and shareholding information. Time stamps of when the participant joined the meeting and left are also recorded alongside device information.

Tabs
More tabs are available at the bottom of the spreadsheet and link to live and pre-voting data and messaging.